Published on Jan 12th, 2022
I create web stuff
Occasionally, I like to share that stuff with people via Twitter. When I share a link to a blog post, like this one, Twitter scans the “meta tags” on my site. It uses those meta tags to determine how to render a tiny summary of the blog post.
To understand what Twitter sees, you can view the page source for this blog post. The HTML shown at that URL is how social media platforms, and search engines like Google can access basic data about your web pages.
For all my blog posts, there are three <meta> tags I use to tell Twitter how I want my links to render when this page is shared:
<meta name="twitter:card"
      content="summary" />

<meta name="twitter:site"
      content="@rhg_dev" />

<meta name="twitter:image"
      content="https://rhg.dev/gen/seo/magic.jpg" />
twitter:cardsays I want a smallsummarycard, not a big image previewtwitter:siteattributes this link to my Twitter handletwitter:imageis what the image I want to see in my preview.
The big plan
Up until a day ago, I was using the same Twitter preview image for all links shared from this website. For example, even though my Advent of Code article had an adorable snowman emoji, I would show the same “waving hand” emoji centered on a pink-to-orange gradient.
I wanted to have each link have a distinct emoji that matched up with the theme of the content. This is what my last post looks like, now that I’ve successfully implemented the feature:

If I wanted to have a custom preview like the one above for every new blog post I wrote, here’s what the manual workflow would look like:
- Find a good 128x128 emoji to match the article.
- Place it in the
./static/imagesfolder. - Open up an image editor like Gimp or Photoshop.
- Overlay the emoji on a pink-to-orange gradient.
- Export the combined image into the
./static/seofolder - Repeat
xtimes for each new image.
Over time, this would get pretty tedious and error-prone. I wanted a solution that would automate this workflow for me that I could run once at build time.
Let’s solve the problem!
I host my website on Netlify and it is powered by Hugo. Any time I make an update to my blog, I push that update to GitHub. From there, Netlify detects the new change and builds my Hugo project with this command.
Because I write my blog posts in markdown, I’m also able to store metadata about each post in YAML at the top of the file. This YAML is usually referred to as “frontmatter”. Here’s a glimpse at what the frontmatter looks like for the blog post you’re currently reading:
title: "SEO Magic with Go"
subtitle: "a tiny little script that generates JPEGs"
image: "magic"
For this blog post, the image field is set to "magic". When rendering this page layout in HTML, I’m able to access the image parameter in the hero at the top of this page. This is what that HTML layout code looks like:
<div class="hero">
  <div class="hero__image"
    style="background-image: url('/images/{{ .Params.image }}.png')"
  ></div>
  <h1 class="hero__title">{{ .Params.title }}</h1>
  <h2 class="hero__subtitle">{{ .Params.subtitle }}</h2>
</div>
When Hugo combines this HTML layout with my markdown content, this is the HTML sent to your web browser:
<div class="hero">
  <div class="hero__image"
    style="background-image: url('/images/magic.png')"
  ></div>
  <h1 class="hero__title">SEO Magic with Go</h1>
  <h2 class="hero__subtitle">a tiny little script that generates JPEGs</h2>
</div>
The .hero__image now points to the file ./static/images/magic.png. This is because Hugo uses the static folder as a place to store top-level assets like images or a /robots.txt file.
Sharing images on Twitter
Earlier in the post, we learned that the twitter:image meta tag is how Twitter knows what image to show users. With Hugo, we can use the same HTML layout + frontmatter trick to create our meta tag:
<meta
  name="twitter:image"
  content="https://rhg.dev/gen/seo/{{ .Params.image }}.jpg" />
Just like before, Hugo replaces {{ .Params.image }} with the image for our blog post: "magic". Here is the final HTML that Twitter sees:
<meta
  name="twitter:image"
  content="https://rhg.dev/gen/seo/magic.jpg" />
So far– everything we did is wonderful! But we can’t stop here, because Twitter will is expecting a file to exist at ./static/gen/seo/magic.jpg… and we haven’t created one yet!
Go to the rescue!
Because the Netlify build server already has Go installed, we can make a script that generates an image for each emoji found in the ./static/images folder.
Here’s a sick visual of what I want to happen for each PNG in that folder:

I’m not really familiar with writing Go scripts, but I’m pretty good at typing things into Google. After searching for how to combine images in Go, I found a helpful example almost identical to what I wanted to do!
I took the script found in the link above, and created a new folder called ./scripts/seo-image-gen to put my new Go stuff:
# Make our folder
mkdir -p scripts/seo-image-gen

# Hop to it!
cd scripts/seo-image-gen
Next, I created a new Go app in that folder using the go CLI:
go mod init github.com/ryan-haskell/seo-image-gen
In Go, the main function is the entrypoint to the application. That means when we call go run main.go later on from the terminal, our program will run the main function.
Here’s what our main function looks like:
package main

func main() {
  // Step 1: Load the background gradient PNG
  bgImage := loadBackgroundImage()

  // Step 2: Make sure the output folder exists
  ensureOuputFolderExists()

  // Step 3: Create a new file for each PNG image
  count := createImagesWithBackground(bgImage)

  // Step 4: Print out a success message
  printSuccessMessage(count)
}
Lets dive into the implementation of each of these functions to see how they work!
Step 1: loadBackgroundImage
Within our scripts/seo-image-gen folder, I created a new folder called backgrounds. Within that folder, I created a 256x256 PNG image showing the pink-to-orange gradient.
This image doesn’t have any emojis overlayed on it, so it will be reused for all the images we generate later on:
func loadBackgroundImage() image.Image {
  // Load the PNG from the filesystem
  bgFile, err := os.Open("backgrounds/square.png")
  if err != nil {
    log.Fatalf("failed to open: %s", err)
  }

  // Decode the PNG
  bgImage, err := png.Decode(bgFile)
  if err != nil {
    log.Fatalf("failed to decode: %s", err)
  }
  defer bgFile.Close()

  // Return that image
  return bgImage
}
Go comes with the ability to easily read files and decode images baked-in. This was great, because I didn’t need any 3rd party packages to make the script work!
Step 2. ensureOuputFolderExists
When we get to the part where we need to create files like static/gen/seo/magic.jpeg, we will get an error if the static/gen/seo folder does not exist.
That’s where this function comes in to save the day:
func ensureOuputFolderExists() {
  os.MkdirAll("../../static/gen/seo", os.ModePerm)
}
Here, I chose to call os.MkdirAll instead of the standard os.Mkdir function. This is because os.MkdirAll will “recursively” create folders.
What this means for our script is that it will create both gen and seo, without requiring gen to already exist. ( Just like how mkdir -p works in the terminal )
Step 3: createImagesWithBackground
To create these new images, we need to do a few things:
- List all the files the
./static/imagesfolder. - Draw the PNG emoji over the PNG gradient.
- Save that as a JPEG to the output folder.
As we go along, I also wanted to keep track of how many images were created. This is returned as count to the caller of the function:
func createImagesWithBackground(bgImage image.Image) int {
  // Read all files in the "static/images" folder
  files, err := os.ReadDir("../../static/images")
  if err != nil {
    log.Fatalf("failed to read folder: %s", err)
  }

  // Will track how many JPEG files were generated
  count := 0

  for _, file := range files {
    // Get filename, without extension
    nameWithExt := file.Name()
    filename := strings.TrimSuffix(nameWithExt, filepath.Ext(nameWithExt))

    // Ignore non-PNG files
    if filepath.Ext(nameWithExt) == ".png" {
      count++
      createCombinedFile(bgImage, filename)
    }
  }

  return count
}
The for loop also calls a function for each image, called createCombinedFile. That’s where we actually combine and create images:
func createCombinedFile(bgImage image.Image, filename string) {
  // Define input & output filepaths
  inputFilepath := fmt.Sprintf("../../static/images/%s.png", filename)
  outputFilepath := fmt.Sprintf("../../static/gen/seo/%s.jpg", filename)

  // Load foreground PNG image file
  fgFile, err := os.Open(inputFilepath)
  if err != nil {
    log.Fatalf("failed to open: %s", err)
  }

  // Decode the file as a PNG image
  fgImage, err := png.Decode(fgFile)
  if err != nil {
    log.Fatalf("failed to decode: %s", err)
  }
  defer fgFile.Close()

  // Describe expected image dimensions and offset
  bgBounds := image.Rect(0, 0, 256, 256)

  fgOffset := image.Pt(64, 64)
  fgBounds := image.Rect(0, 0, 128, 128).Add(fgOffset)

  // Validate against actual image dimensions
  actualFgBounds := fgImage.Bounds().Size()

  // Exit with helpful error if a PNG is not 128x128
  if actualFgBounds.X != 128 || actualFgBounds.Y != 128 {
    printInvalidImageError(filename, actualFgBounds)
  }

  // Create a new combined image
  combinedImage := image.NewRGBA(bgBounds)
  draw.Draw(combinedImage, bgBounds, bgImage, image.Point{}, draw.Src)
  draw.Draw(combinedImage, fgBounds, fgImage, image.Point{}, draw.Over)

  // Save the combined image to the filesystem
  combinedFile, err := os.Create(outputFilepath)
  if err != nil {
    log.Fatalf("failed to create: %s", err)
  }
  jpeg.Encode(combinedFile, combinedImage, &jpeg.Options{Quality: jpeg.DefaultQuality})
  defer combinedFile.Close()
}
There are a few steps in the code above, but the interesting thing to notice is the validation step. When I initially ran this program, one of my emojis was 256x256. This led to an incorrectly rendered image– where the icon was clipped in half!
I know I’m not a clever man, and manually reviewing all images will only get harder as a make more and more content– so I wanted to create a helpful error message.
That involved defining the printInvalidImageError function, which prints a helpful error message if something went wrong:
func printInvalidImageError(filename string, actualBounds image.Point) {
  log.Fatalf(
    "\n\n  Problem with %s./static/images/%s.png%s :\n\n    Expected size %s128x128%s, found %s%dx%d%s\n\n",
    YELLOW,
    filename,
    RESET,
    GREEN,
    RESET,
    CYAN,
    actualBounds.X,
    actualBounds.Y,
    RESET,
  )
}
To make the error easier to read, I searched for an article on how to use terminal color codes in Go. If an image is the wrong size, we get a message that tells us which file we need to change:
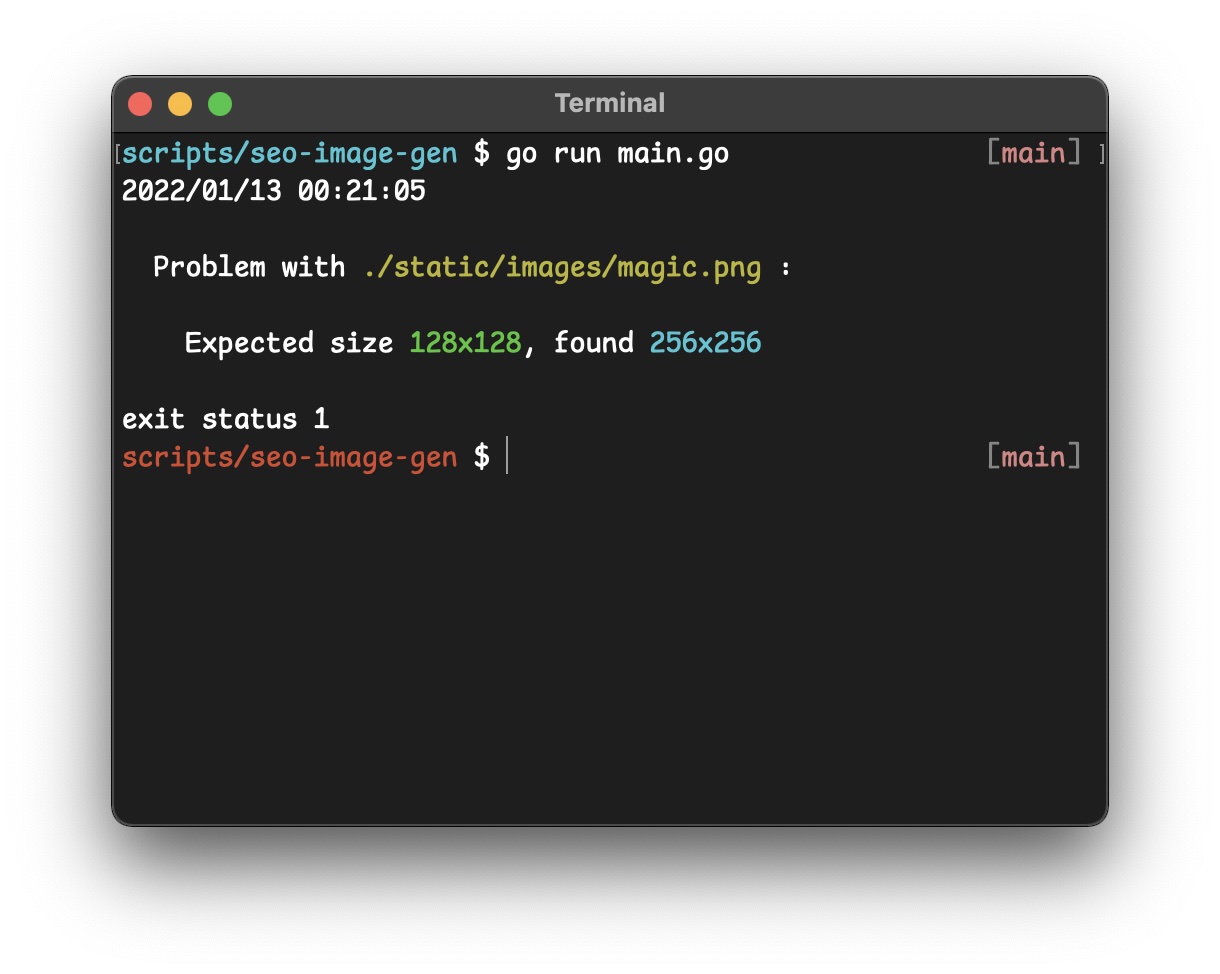
Here, the magic.png I added is too big– so I’ll need to edit the size before my script will finish successfully.
Step 4: printSuccessMessage
The very last function in this script prints a happy success message if everything worked out alright.
func printSuccessMessage(count int) {
	log.Printf(
		"\n\n %s%d%s SEO images generated!\n\n",
		GREEN,
		count,
		RESET,
	)
}
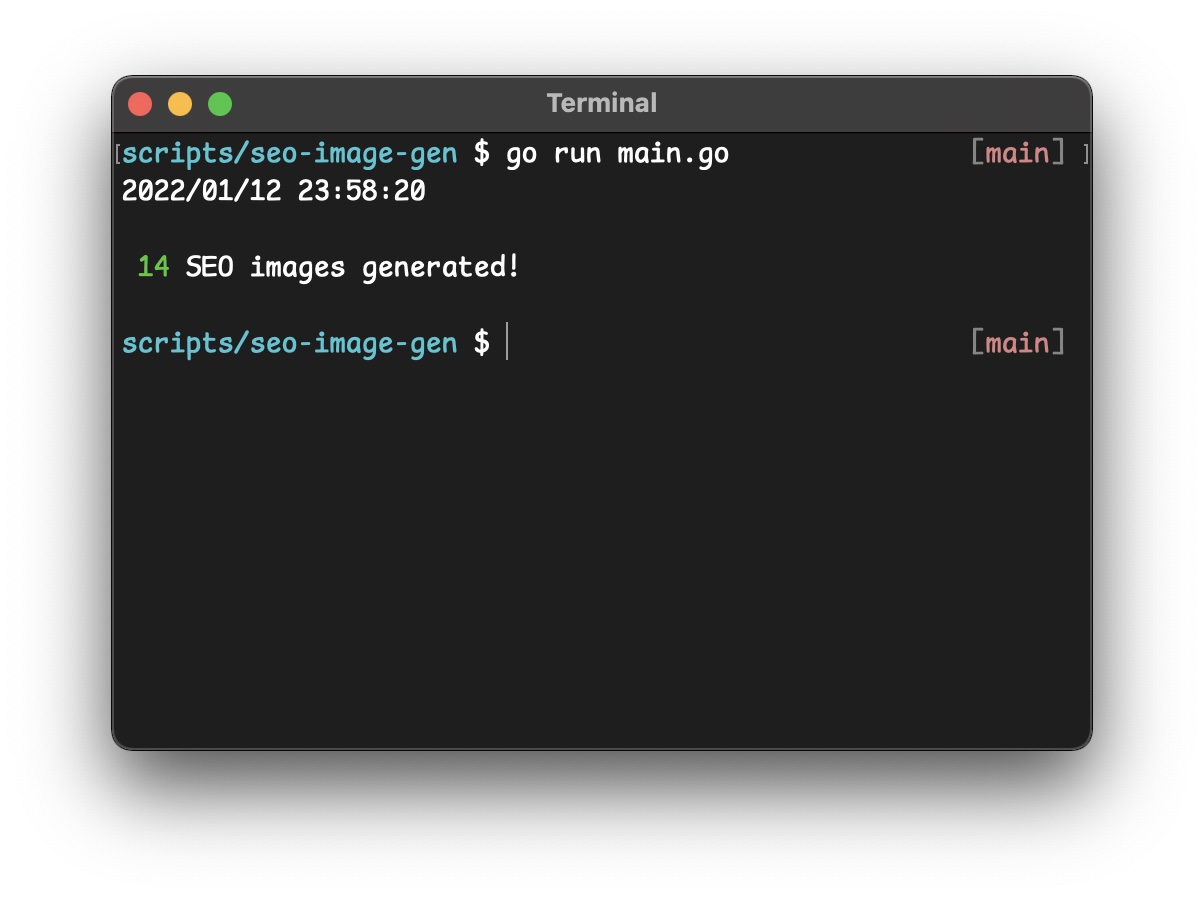
If all the images are the correct size, here’s what I get after running the script from my terminal:
Deploying to Netlify
Now that everything works locally, I’ll need to let Netlify know to run this on builds. I already have a netlify.toml configuration file at the root of my project that tells Netlify how to build my project.
This is what my build configuration looked like before:
# Config for hosting via https://netlify.com
[build]
  publish = "public"
  command = "hugo"
And here’s what it looks like now:
# Config for hosting via https://netlify.com
[build]
  publish = "public"
  command = "(cd scripts/seo-image-gen && go run main.go) && hugo"
Using parentheses around the cd and go run commands means I won’t be in the scripts/seo-image-gen folder when it comes time to run hugo to build my code.
I also learned the hard way that it’s important my script runs before hugo. This way, the static files are correctly placed into the final public folder and published to the web!
Creating bug-free vibes
The best part of adding the image size validation step is that Netlify won’t build if I accidentally upload an invalid image. Because the Go script we wrote returns a non-zero exit code, the build will not pass.
That means users will never experience this problem, because it can’t make it into production.
My first production Go script!
This blog post broke our Go script into small chunks, so I could walk you through how it works.
If you’d like to see the whole thing in one place, here is a link to GitHub Gist containing all the code.
Thanks for reading! Feel free to follow me on Twitter at @rhg_dev and let me know if this article was a helpful resource.