Published on Aug 2nd, 2020
A few weeks ago, I released a new version of elm-spa, a tool that makes building single-page applications with Elm easier!
If you’re new to elm-spa, you should check out the official elm-spa guide! If you’re new to Elm, there’s an official Elm guide for that too!
Long before there was elm-spa, there was a popular GitHub repo created by Richard Feldman called elm-spa-example that provided beginners with a real world example of how to make an application with Elm! It wasn’t just a TodoMVC app- it actually had things like API requests, user authentication, local storage and more!
I thought if elm-spa was actually useful for building real world applications, I should create my own “elm-spa-spa-example” to show how I would structure a project with elm-spa!
And so that’s what I did!
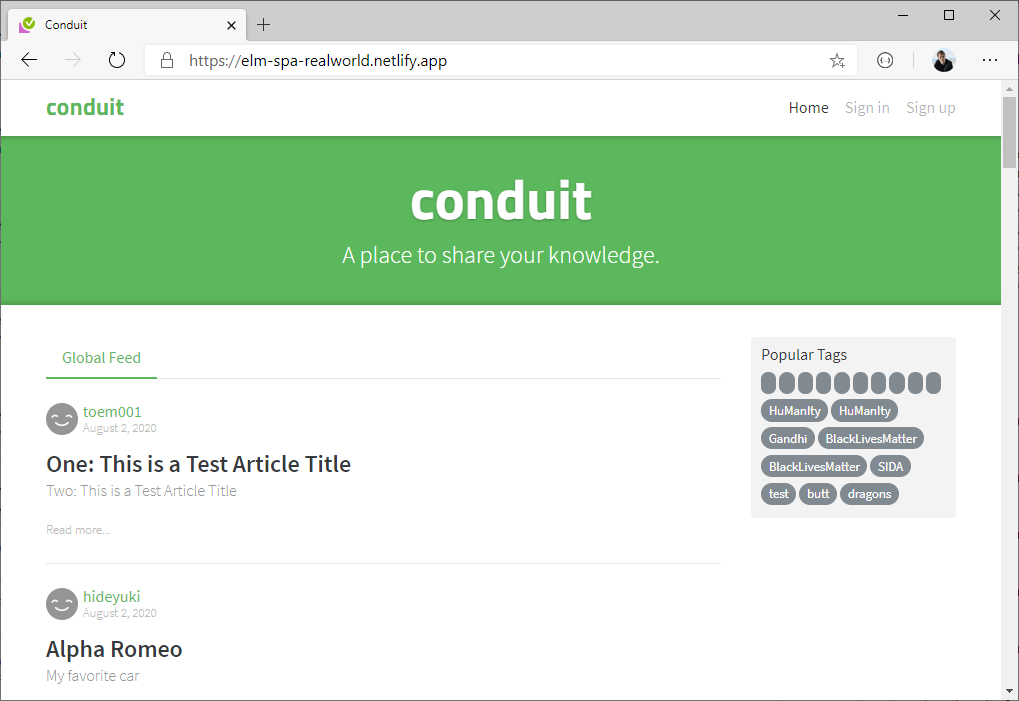
Here’s the complete application, available at realworld.elm-spa.dev
Getting started
I started with a clean elm-spa project by installing the CLI with node:
npm i -g elm-spa@latest
elm-spa init html elm-spa-realworld
This command created a folder called elm-spa-realworld, and I could easily run my new project with the npm start command.
cd elm-spa-realworld
npm start
Creating pages
The Realworld repo has access to a full specification of which pages should exist:
- Home page (URL: /#/ )
- Sign in/Sign up pages (URL: /#/login, /#/register )
- Settings page (URL: /#/settings )
- Editor page to create/edit articles (URL: /#/editor, /#/editor/article-slug-here )
- Article page (URL: /#/article/article-slug-here )
- Profile page (URL: /#/profile/:username )
With the command line tool, I was able to translate that spec into pages:
elm-spa add application Top
elm-spa add application Login
elm-spa add application Register
elm-spa add application Settings
elm-spa add application Editor
elm-spa add application Editor.ArticleSlug_String
elm-spa add application Article.Slug_String
elm-spa add application Profile.Username_String
That was it! With one command to create the project, I had initialized a new Elm application. With 8 more, I had created every page my application needed! All the routing code and page boilerplate was automatically generated under the hood.
Visiting /settings would render Pages.Settings, and hitting a route like /profile/ryan took me to the Pages.Profile.Username_String page with { username = "ryan" } already passed into my init function.
Only one problem: all the pages were blank! The next step was to actual render some HTML!
Adding in views
I was able to take the existing HTML templates provided by the Realworld specification, and use the incredible HTML-to-Elm tool to turn something like this:
<footer>
<div class="container">
<a href="/" class="logo-font">conduit</a>
<span class="attribution">
<span>An interactive learning project from</span>
<a href="https://thinkster.io">Thinkster</a>
<span>. Code & design licensed under MIT.</span>
</span>
</div>
</footer>
Into something like this:
footer []
    [ div [ class "container" ]
        [ a [ class "logo-font", href "/" ] [ text "conduit" ]
        , span [ class "attribution" ]
            [ span [] [ text "An interactive learning project from" ]
            , a [ href "https://thinkster.io" ] [ text "Thinkster" ]
            , span [] [ text ". Code & design licensed under MIT." ]
            ]
        ]
    ]
Thanks to that tool, I was able to quickly create Html for all my pages. Anytime I needed to reuse some UI, I’d move it into a “Component” module (like Components.Navbar or Components.Footer). This followed the strategy outlined in elm-spa’s section on Components: using the simplest API possible, and passing in data or messages if necessary!
Working with an API
Realworld comes with a built-in API endpoint for working with the real users, articles, and comments. For this app, I thought it would be best to keep all of that code under the Api folder, so it would be easy for a beginner to find.
I started by translating the official API spec into Elm modules.
Here’s an example of how I translated the Comments API into a Api.Article.Comment module
Add Comments to an Article
POST /api/articles/:slug/comments

Get Comments from an Article
GET /api/articles/:slug/comments

Delete Comment
DELETE /api/articles/:slug/comments/:id
module Api.Article.Comment exposing
  ( Comment
  , create, get, delete
  )

type Comment = { ... }

create : { token : Token, comment : ... } -> Cmd msg
get : { token : Maybe Token, articleId : Id } -> Cmd msg
delete : { token : Token, articleId : Id } -> Cmd msg
After defining the module’s API, I went in later to fill in the details!
The Realworld specification also contained JSON snippets for all of the data types, which allowed me to create decoders and create basic tests with elm-test!
describe "Api.Article.Comment"
    [ test "decodes example from spec" <|
        \_ ->
            """
            {
                "id": 1,
                "createdAt": "2016-02-18T03:22:56.637Z",
                "updatedAt": "2016-02-18T03:22:56.637Z",
                "body": "It takes a Jacobian",
                "author": {
                    "username": "jake",
                    "bio": "I work at statefarm",
                    "image": "https://i.stack.imgur.com/xHWG8.jpg",
                    "following": false
                }
            }
            """
                |> Json.decodeString Api.Article.Comment.decoder
                |> Expect.ok
    ]
Of course there’s plenty more I could test for an Expect.ok, but I wanted these tests in here to make sure I wasn’t missing the basics.
Storing the user token
Because Elm doesn’t natively work with local storage, we use ports! For all my elm-spa projects, I create a single Ports.elm file that defines the ways to communicate with JavaScript for things like talking to local storage!
port module Ports exposing (clearUser, saveUser)

import Api.User exposing (User)
import Json.Decode as Json
import Json.Encode as Encode


port outgoing :
    { tag : String
    , data : Json.Value
    }
    -> Cmd msg


saveUser : User -> Cmd msg
saveUser user =
    outgoing
        { tag = "saveUser"
        , data = Api.User.encode user
        }


clearUser : Cmd msg
clearUser =
    outgoing
        { tag = "clearUser"
        , data = Encode.null
        }
This is my entire Ports.elm file for the Realworld application. It uses a single port to send messages to JavaScript, and then JS can handle those messages on the other side:
var flags = {
  user: JSON.parse(localStorage.getItem('user')) || null
}

var app = Elm.Main.init({ flags: flags })

app.ports.outgoing.subscribe(({ tag, data }) => {
  switch (tag) {
    case 'saveUser':
      return localStorage.setItem('user', JSON.stringify(data))
    case 'clearUser':
      return localStorage.removeItem('user')
    default:
      return console.warn(`Unrecognized Port`, tag)
  }
})
When the application starts up, it checks local storage for an existing user token, and initializes the user in Shared.elm if it can find one!
module Shared exposing (Flags, Model, init, ...)

type alias Flags =
    Json.Value


type alias Model =
    { url : Url
    , key : Key
    , user : Maybe User
    }


init : Flags -> Url -> Key -> ( Model, Cmd Msg )
init json url key =
    let
        user =
            json
                |> Json.decodeValue (Json.field "user" Api.User.decoder)
                |> Result.toMaybe
    in
    ( Model url key user
    , Cmd.none
    )
I assume the incoming flags are raw JSON, and then safely parse them into a Maybe User type. Because I’m using elm-spa, this shared.user value will be available to all of my pages. I recommend always using Json.Value for your Shared.Flags, so you can safely handle bad JSON from outside your application!
One last note on ports: The best part about working with Javascript ports is they will work with any type of message. This means you can call functions like Ports.clearUser on any page you need it. Just import Ports and you’re all set!
Using utils
Whenever I need a function to work with a particular data structure, I create a new module in the Utils folder. For example when I wanted to format dates by turning Time -> String, I created a file called src/Utils/Time.elm and then implemented the formatDate function in one place.
It’s usually a good idea to write a few tests around the functions created within Utils. By nature, they are super easy to test with!
Wrapping up
It took me about 3-4 coding sessions (~16 hours total), to implement all this from scratch using elm-spa!
When the project was complete, I took a look at the structure I left behind. Overall, I was really happy with how easy it was to navigate around the project!
src/
  Api/...
  Components/...
  Pages/...
  Utils/...
  - Main.elm
  - Ports.elm
  - Shared.elm
That being said, I didn’t use all the advanced techniques outlined in Richard Feldman’s elm-spa-example. If you are interested in learning those advanced techniques I recommend checking out the following resources:
- Scaling Elm Apps - Richard Feldman
- The Life of a File - Evan Czaplicki
- Robot Buttons from Mars - Brian Hicks
If you’re interested in more, checkout one of Richard’s Frontend Masters courses. They really helped me when I was learning!
Thanks so much for reading! If you create something cool with elm-spa, I’d love to feature your project at elm-spa.dev/examples